Onboarding users
— NameRover — 3 min read
The first step in the user journey is onboarding. It introduces users to the app and helps them get started. The goal is to make the onboarding process as smooth as possible to increase user retention and engagement.
I'm not a big fan of onboarding screens. Neither as a developer nor as a consumer. They provide no value to the user and are often skipped or ignored. Bearing that in mind, the question is how to onboard users on NameRover without annoying them.
Since Apple has recently become very strict when it comes to privacy and user data collection, my idea is to ask the user once at the first app launch for the necessary permissions. I would ask for permission to (anonymously) track data usage (Analytics), collect crash reports (Crashlytics), and send push notifications.
The push notifications feature is not critical since everything in the app is instant and real-time, but it might be useful later for sending optional promotions or reminders.
So this is what I came up with for the onboarding:
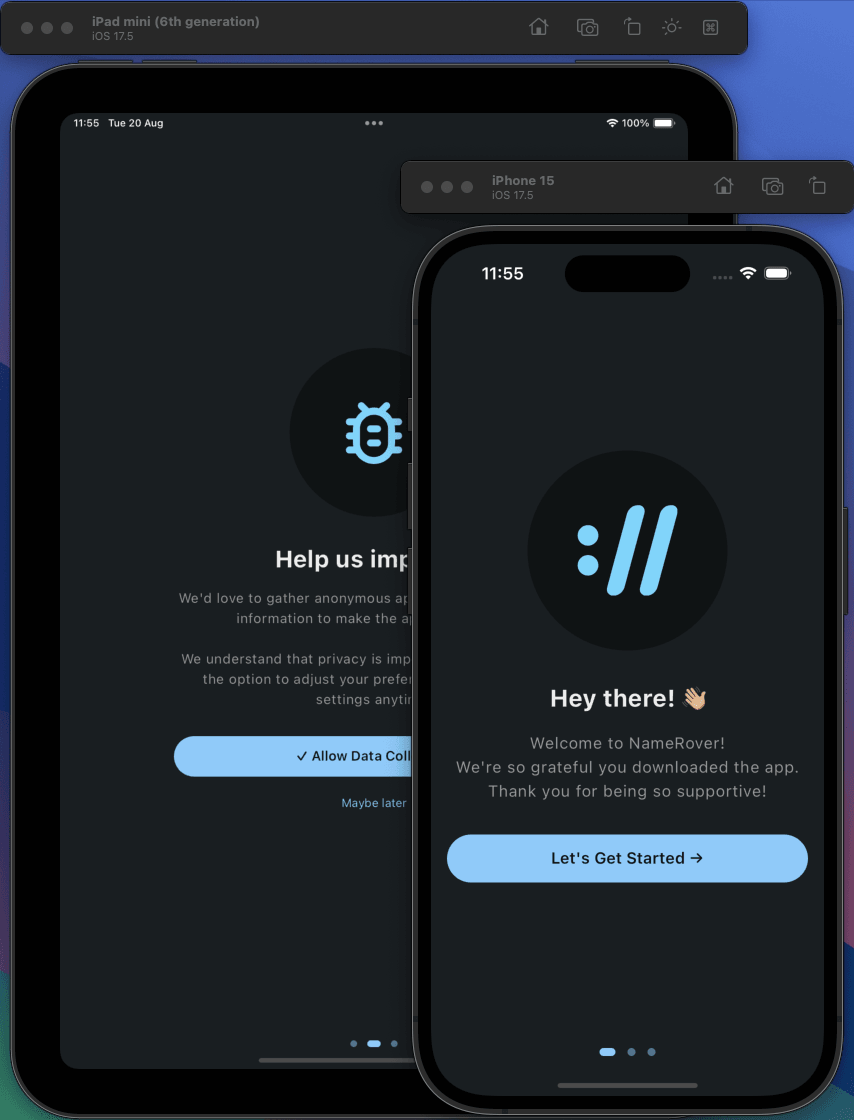
- Welcome screen
- Permission request for data collection screen
- Permission request for push notifications screen
Data collection permissions
All permissions are turned off by default, and the user can enable them later in the app settings.
For example, for Crashlytics, I temporarily turn off the reporting at the time of compilation by adding the following line to the AndroidManifest.xml file:
<meta-data android:name="firebase_crashlytics_collection_enabled" android:value="false" />Similarly, on iOS, I disable the Crashlytics reporting by adding the following line to the Info.plist file:
<key>FirebaseCrashlyticsCollectionEnabled</key><false/>Later, when the user enables Crashlytics reporting in the app settings, I allow it by setting the value to true.
FirebaseCrashlytics.instance.setCrashlyticsCollectionEnabled(true);The same goes for the Analytics. I turn off the tracking by default and enable it later when the user agrees.
For Android, I add the following line to the AndroidManifest.xml file:
<meta-data android:name="firebase_analytics_collection_enabled" android:value="false" />For iOS, I add the following line to the Info.plist file:
<key>FIREBASE_ANALYTICS_COLLECTION_ENABLED</key><false/>And later, when the user agrees to the tracking, I enable it by setting the value to true.
FirebaseAnalytics.instance.setAnalyticsCollectionEnabled(true);Permission statuses will be stored locally using the flutter_secure_storage package and synced with the backend server when the user logs in. They need to be toggable on the settings screen.
Push notifications
Push notifications are handled with the permission_handler package, which must be set up properly on all platforms. It also requires a backend server to send the notifications. For now, only asking for permission will suffice.
The onboarding process will be implemented in the OnboardingScreen, which will be shown only once when the app is launched for the first time.
This logic is automatically handled by the auto_route's guard class:
//...if (await diContainer<AppController>().isOnboardingCompleted) { if (diContainer<UserRepository>().isUserSignedIn) { resolver.next(); } else { await router.replaceAll([const LoginRoute()]); }} else { await router.replaceAll([const OnboardingRoute()]);}//...Onboarding design
After everything is set up, all that is left is to design nice screens for each onboarding step and put everything in motion.
Overall, I'm happy with the onboarding process and hope the users will be too. 🚀